Open and Run Multiple Projects With One Command in WSL2 From Windows Terminal
Tools/ (Posted on )
When I develop projects running on Ubuntu inside WSL2 that are divided into subprojects, I use Windows Terminal to have both backend and frontend open side-by-side at the same time in two panes. Then I run the commands that start these projects up one by one in their respective panes. Instead of doing that by hand whenever its time for work, it can be automated with a custom command that creates the necessary panes, opens the project directories and runs the commands that start the projects up.
Step 1 - Creating a Custom Action
You can create a custom command in Windows Terminal by specifying it in your settings.json inside of the actions array. If you need a refresher on how to customize your Windows Terminal, check out my Windows Terminal Configuration Tips for Improved Workflow post about it. Basically, open the settings by pressing Ctrl + Shift + , and find the aforementioned property in the JSON structure.
Here is the structure of a custom command.
"actions": [
  {
    "command": {
      "action": "wt",
      "commandline": "new-tab --title AwesomeApp --tabColor #2e84e8 -p Ubuntu"
    },
    "name": "Open my awesome app"
  }
]
The action defines what Windows Terminal action the command will execute, which in this case is wt, which basically is the command line interface to manage Windows Terminal. The commandline is the arguments you provide to wt. In this case, Windows Terminal will open a new tab in Ubuntu profile, which is specified with the -p flag, and give it a title and a color, which are specified by --title and --tabColor flags respectively.
This custom command can be accessed from the command palette by pressing Ctrl + Shift + p and searching for the specified name - Open my awesome app. Or, it can can also be invoked using a key-binding, which requires keys property to be added to the configuration.
"actions": [
  {
    // ...
    "name": "Open my awesome app",
    "keys": "ctrl+alt+b"
  }
]
After running the command, a new tab with a custom title and color gets opened in the Ubuntu profile.
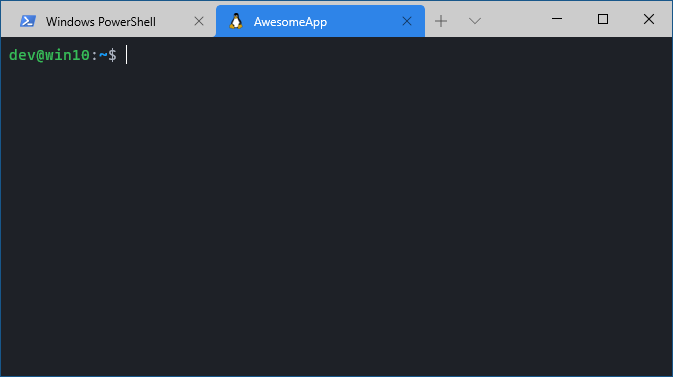
Note that some Linux distributions override the tab title, and you won’t see the title you passed via --title argument. To force the specified title, change the defaults setting under profiles to include suppressApplicationTitle.
"profiles": {
  "defaults": {
    "suppressApplicationTitle": true
  }
}
Step 2 - Creating Multiple Panes and Opening Directories
Now that the command is working and properly creates a new tab, let’s expand it to create two more panes that open directories for two different projects. To split the pane use the split-pane argument which can take flags -V or -H to specify in which direction to do the splitting - vertically or horizontally. Omitting the flags will fall back to auto mode being used, which automatically picks the optimal direction.
Each new pane in argument list needs to be separated from the next one with ;.
To specify the working directory of each pane use the -d argument.
The --title and --tabColor must be repeated for each pane, otherwise, when a pane without a set title or color will be focused, it will fall back to the default respective setting.
I will omit the the title, tab color and the profile specifications from now on. I can also omit the new-tab command, because it is the default one. When omitting the profile flag, the default profile gets loaded, which in my case is Ubuntu, therefore it is redundant to specify it each time in my case. I will omit all of these arguments for the sake of readability, because the command is going to get long.
Since the configuration is done in JSON format, which requires the command to be one long string, I will show each part of the configuration separately. Later these parts need to be concatenated together, placing ; between them.
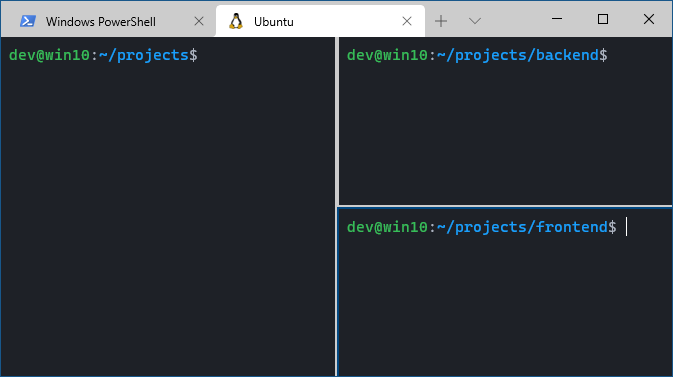
-d \\\\wsl$\\{DISTRO_NAME}\\home\\{USER}\\projects
This part creates a new tab and opens projects directory located under home directory.
split-pane -V -d \\\\wsl$\\{DISTRO_NAME}\\home\\{USER}\\projects\\backend
This part splits the previous pane vertically and opens backend directory located under ~/projects directory.
split-pane -H -d \\\\wsl$\\{DISTRO_NAME}\\home\\{USER}\\projects\\frontend
Finally, this part splits the previously split pane horizontally and opens the frontend directory.
{
  "command": {
    "action": "wt",
    "commandline": "-d \\\\wsl$\\Ubuntu\\home\\dev\\projects; split-pane -V -d \\\\wsl$\\Ubuntu\\home\\dev\\projects\\backend; split-pane -H -d \\\\wsl$\\Ubuntu\\home\\dev\\projects\\frontend"
    },
  "name": "Open my awesome app"
}
Step 3 - Executing Bash Commands
This is the most exciting part and the most time consuming one that I figured out by digging through many GitHub issues. To execute a command, you need to specify a path to a shell for the wt command to use. Since I am running Ubuntu in WSL2, I use Bash. Then, I pass Bash the -i and -l flags to open it in interactive mode and log in. Lastly, the -c flag specifies the actual command to execute.
"commandline": "-d \\\\wsl$\\{DISTRO_NAME}\\home\\{USER}\\projects \"%windir%\\System32\\bash.exe\" -i -l -c \"ls && bash\""
This example prints the contents of the current directory. The && bash part is used to prevent the window from closing immediately after successful execution of the ls command.
Going back to our case of three panes with two projects to run, let’s apply the same principle.
-d \\\\wsl$\\Ubuntu\\home\\dev\\projects
split-pane -V -d \\\\wsl$\\{DISTRO_NAME}\\home\\{USER}\\projects\\backend \"%windir%\\System32\\bash.exe\" -i -l -c \"node index.js\"
split-pane -H -d \\\\wsl$\\{DISTRO_NAME}\\home\\{USER}\\projects\\frontend \"%windir%\\System32\\bash.exe\" -i -l -c \"npm start\"
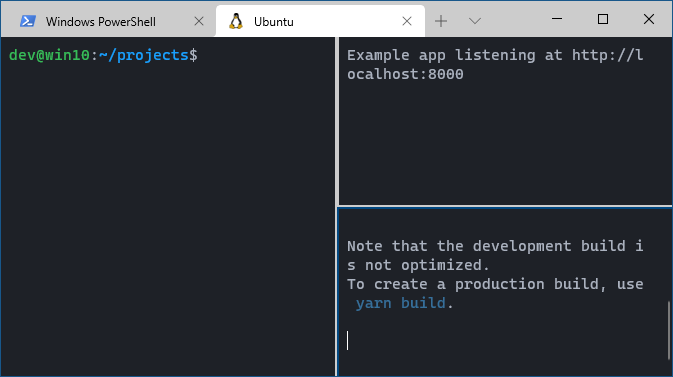
Gluing it all together produces one of the longest lines of text I have unironically written.
{
  "command": {
    "action": "wt",
    "commandline": "-d \\\\wsl$\\Ubuntu\\home\\dev\\projects; split-pane -V -d \\\\wsl$\\Ubuntu\\home\\dev\\projects\\backend \"%windir%\\System32\\bash.exe\" -i -l -c \"node index.js\"; split-pane -H -d \\\\wsl$\\Ubuntu\\home\\dev\\projects\\frontend \"%windir%\\System32\\bash.exe\" -i -l -c \"npm start\""
  },
  "name": "Open my awesome app"
}
Which achieves the desired result of a backend Express application and a frontend React application being started.